➫ New york : 13 units of Ekopel 2K Bathtub Refinishing Kit Includes Foam... delivery to DUMBO .. ★ 2020
Regular buyers of the product Ekopel 2K Bathtub Refinishing Kit -Includes Foam Roller/Scoop - Odorless DIY Sink/Tub Reglazing Kit - 20X Thicker Than Other Tub Kits- No Peel Pour On Tub Coating - Bright Gloss Tub Coating (White) It was sent home from New york to the street DUMBO .. the offer presented an increase of %50 the last days Get it easily and it is a product that offers you everything you need.
rumk1n7pboa


REMODEL IT YOURSELF: No need to hire a spendy expert. This refinishing kit takes the expense out of bathtub improvement. Perfect for renters, apartment dwellers, and residential or commercial tubs, sinks, showers. ECO-FRIENDLY STEP-BY-STEP DEMO VIDEOS: Free videos take the mystery out of re-glazing. We guide you through the prep, the application, and finishing steps. If you can follow instructions, you can DIY recast your tub in 2 to 4 hours. Find the videos at https://www.youtube.com/refinishedbathsolutions KIT CONTAINS EVERY TOOL YOU NEED: Our tub 24-HOUR CURE TIME: After applying Ekopel, it takes 24 hours to “set†before using your tub/shower. Maintain 72 degrees Fahrenheit in bathroom for shortest cure. In lower temps, it will take longer to set.
Ques tions and answers
- I saw that they have stock of Ekopel 2K Bathtub Refinishing Kit -Inc, buying 5 the shipping is free?
if we send to Buffalo Soapstone - Alaska for now it is free Ekopel 2K Bathtub Refinishing Kit -Inc
- What is the cost of shipping to Kit Carson ?
for the weight of the product of Ekopel 2K Bathtub Refinishing Kit -I .. buying up to 4 units the shipping is free for Kit Carson
- I live in Safford (Arizona) the shipping is free?
buying this week the shipping of Ekopel 2K Bathtub Refinishing Kit .. is free for Safford (Arizona)
- Is there a problem with sending in Niwot ? Thanks a lot
if we send to Niwot for now it is free Ekopel 2K Bathtub Refinishing Kit -Includes Foam
- What is the cost of shipping to El Jebel ?
buying this week the shipping of Ekopel 2K Bathtub Refinishing Kit .. is free for El Jebel
- shipping is at home because I live in Vacaville - California
If I send it to you for free from Ekopel 2K Bathtub Refinishing Kit -Includ to Vacaville - California
- I live in Geiger the shipping is free?
There is no cost to send Ekopel 2K Bathtub Refinishing K to Geiger
- reaches Aetna Estates I ask before asking
If the delivery of Ekopel 2K Bathtub Refinishing Kit -Includes Foa .. is free for Aetna Estates
- Is there a problem with sending in Ridgeway - Alaska ? Thanks a lot
buy without problems the shipping of Ekopel 2K Bathtub Refinishing Kit -Includes Foam is free to Ridgeway - Alaska
- I live in Beluga - Alaska the shipping is free?
There is no cost to send Ekopel 2K Bathtub Refinishing Kit -Includes Foam R to Beluga - Alaska
- How is the shipping if I am from Amity -Arkansas ?
If I send it to you for free from Ekopel 2K Bathtub Refinishing Kit -Incl to Amity -Arkansas
- how much is the shipping of Ekopel 2K Bathtub Refinishing Kit -Includes F?
If I send it to you for free from Ekopel 2K Bathtub Refinishing Kit -Includes F to Sumiton
- Buying 10 products, do you send it to GraysonValley ?
buying 2 units of Ekopel 2K Bathtub Refinishing Kit -Inc .. the shipping is free for GraysonValley
- Buying 10 products, do you send it to Susan Moore ?
If the delivery of Ekopel 2K Bathtub Refinishing Kit -Inclu .. is free for Susan Moore
- I saw that they have stock of Ekopel 2K Bathtub Refinishing K, buying 5 the shipping is free?
buy without problems the shipping of Ekopel 2K Bathtub Refinishing K is free to Kalifornsky - Alaska
- I saw that they have stock of Ekopel 2K Bathtub Refinishing Kit -Include, buying 5 the shipping is free?
if we send to the Rutledge area and it's free Ekopel 2K Bathtub Refinishing Kit -Include
- Buying 10 products, do you send it to Stratton ?
buying this week the shipping of Ekopel 2K Bathtub Refinishing Kit -Inc .. is free for Stratton
- How is the shipping if I am from Sherrill - New York ?
if we send to the Sherrill - New York area and it's free Ekopel 2K Bathtub Refinishing Kit
- shipping is at home because I live in SpanishFort
shipping is fast and free for SpanishFort from Ekopel 2K Bathtub Refinishing Kit -Includes
- I live in Lazy Mountain - Alaska the shipping is free?
there is a lot of stock therefore it is free to Lazy Mountain - Alaska from Ekopel 2K Bathtub Refinishing Kit -I
- How is the shipping if I am from HornHill ?
buy without problems the shipping of Ekopel 2K Bathtub Refinishing Kit is free to HornHill
- shipping is at home because I live in Sylvania
There is no cost to send Ekopel 2K Bathtub Refinishing to Sylvania
- how much is the shipping of Ekopel 2K Bathtub Refinishing Kit?
The sending of Ekopel 2K Bathtub Refinishing Kit .. has no cost for Reeltown
- I saw that they have stock of Ekopel 2K Bathtub Refinishing Kit -Includes Foa, buying 5 the shipping is free?
buying 2 units of Ekopel 2K Bathtub Refinishing Kit -Includes Foa .. the shipping is free for Ragland
- If I buy today, will you send it to me for free? i'm from HighlandLake
there is a lot of stock therefore it is free to HighlandLake from Ekopel 2K Bathtub Refinishing Kit
- I'm close to Palmdale - California , will you send it to me?
for the weight of the product of Ekopel 2K Bathtub Refinishing Kit -Includes Fo .. buying up to 4 units the shipping is free for Palmdale - California
Six years ago, we had our harvest gold tub painted by a “professional†and had problems with chipping paint from the very beginning. Over the years, I used some of the $20 bathtub refinishing kits found at Home Depot to touch up the peeling areas. I applied it with a brush and it looked crappy, but when company was coming, we would sand and paint paint over the bare spots and hoped they wouldn’t notice. Finally, we got sick of looking at it and decided to just replac e the tub and surrounding tile walls. The first quote we got was $5,000! At first we were going to do it, then decided we didn’t want the expense and the mess of a remodel, so I was going to do the work myself. We kept weighing this option against simply buying another $20 kit and doing another touch up, but we were just sick and tired of it all. This is when I discovered Ekopel 2K. I have a lot of experience working with epoxy and know how strong the stuff is. We decided to order the kit and give it one last try before we dynamited the whole darn bathroom. The first thing was to remove all the old paint and a lot of it came off easily with single-edge razor blades. I found the best trick was to clamp the blade in a vice grip pliers and chisel it off that way. I was able to get most of it off in an hour or so. I did have to use some paint stripper in the spots where I had touched up the paint with the $20 kits but that wasn’t too bad. I cleaned the tub and used the recommended Lysol Toilet cleaner with the acid. According to the video, the Lysol is supposed to etch the surface of the tub, but it still looked shiny to me and I was concerned that the epoxy wouldn't take a bite, so I used my power sander and went over the entire tub to remove a bit of the shine. Maybe I didn’t need to do this, but I had the time and the tools, so I went with it. All of this paint removal and prep took me about three hours. The YouTube video set provided by the supplier, Refinished Bath Solutions, was extremely helpful and I watched the application portion at least three times. I followed the method as best as I could for a first timer, and it came out very well. I was concerned there wouldn’t be enough material to do the job, but it turned out I had almost 1-1/2 cups left over, and I even coated the soap dish. I think it took about 1-1/2 hours from the time I opened the can. The biggest problem area was working with the drain. One hassle was the toilet being in the way, so I would have to reach over to scoop the epoxy out. I would invariably bump my arm on the side of the tub and have to reapply in that area. As the material cured, I would continue to scoop out the material from the drain. About 6 hours after I started the application I removed the drain cover. Some material migrated over the drain flange which I removed the next morning with a razor and messed it up a bit there. One pro tip, use knee pads, even if you get a cheap pair. Something else to mention, the paint didn’t arrive with any instructions at all. At the last minute I discovered the Ekopel 2K Technical Data Sheet provided by the manufacturer, Pabrec, which contains some important information not mentioned in the videos. I am very pleased with this product and expect the finish to outlast me and my wife.
I am a property manager and a very experienced DIY’er and I would have to say that this was one of the most challenging projects that I have taken on in the last couple of years. On a difficulty scale of 1 to 10 for a DIY’er, I would give it a 9. - There are no instructions included with the product, but after finding them in the web, and watching an hour of YouTube, I thought I was prepared. - Prepping and taping the tub and surrounding area took over two hours. - Applying Ekopel means awkwardly leaning over your tub for 90 minutes, which is back straining to say the least. - There is a huge mess throughout the process, and cleanup is a nightmare. - If you are not able to remove your drain you are in for an even bigger challenge. I am looking at the result now and try to figure out how much sanding and which new product I am going to buy to cover up the problems. - There was just barely enough material included to cover my tub. - They make it seem if the pour over method will magically create the perfect layer across the entire tub. This is not the case. I have thin spots in some areas, and thick drips in others. - Although I followed the instructions about not scraping the bottoms or sides at the end, I still ended up with brown spots in some areas. After prep, application and initial clean up I am 7 hours into this job. I now need to make a trip to the hardware to buy a lot of sand paper to hopefully smooth out the drips, and a competitor’s product to hopefully fix the issues with the drain area and the thin spots. Those jobs should add another 3-4 hours, for a total of over 10 hours and close to $200. Not impressed...
Six years ago, we had our harvest gold tub painted by a “professional†and had problems with chipping paint from the very beginning. Over the years, I used some of the $20 bathtub refinishing kits found at Home Depot to touch up the peeling areas. I applied it with a brush and it looked crappy, but when company was coming, we would sand and paint paint over the bare spots and hoped they wouldn’t notice. Finally, we got sick of looking at it and decided to just replace the tub and surrounding tile walls. The first quote we got was $5,000! At first we were going to do it, then decided we didn’t want the expense and the mess of a remodel, so I was going to do the work myself. We kept weighing this option against simply buying another $20 kit and doing another touch up, but we were just sick and tired of it all. This is when I discovered Ekopel 2K. I have a lot of experience working with epoxy and know how strong the stuff is. We decided to order the kit and give it one last try before we dynamited the whole darn bathroom. The first thing was to remove all the old paint and a lot of it came off easily with single-edge razor blades. I found the best trick was to clamp the blade in a vice grip pliers and chisel it off that way. I was able to get most of it off in an hour or so. I did have to use some paint stripper in the spots where I had touched up the paint with the $20 kits but that wasn’t too bad. I cleaned the tub and used the recommended Lysol Toilet cleaner with the acid. According to the video, the Lysol is supposed to etch the surface of the tub, but it still looked shiny to me and I was concerned that the epoxy wouldn't take a bite, so I used my power sander and went over the entire tub to remove a bit of the shine. Maybe I didn’t need to do this, but I had the time and the tools, so I went with it. All of this paint removal and prep took me about three hours. The YouTube video set provided by the supplier, Refinished Bath Solutions, was extremely helpful and I watched the application portion at least three times. I followed the method as best as I could for a first timer, and it came out very well. I was concerned there wouldn’t be enough material to do the job, but it turned out I had almost 1-1/2 cups left over, and I even coated the soap dish. I think it took about 1-1/2 hours from the time I opened the can. The biggest problem area was working with the drain. One hassle was the toilet being in the way, so I would have to reach over to scoop the epoxy out. I would invariably bump my arm on the side of the tub and have to reapply in that area. As the material cured, I would continue to scoop out the material from the drain. About 6 hours after I started the application I removed the drain cover. Some material migrated over the drain flange which I removed the next morning with a razor and messed it up a bit there. One pro tip, use knee pads, even if you get a cheap pair. Something else to mention, the paint didn’t arrive with any instructions at all. At the last minute I discovered the Ekopel 2K Technical Data Sheet provided by the manufacturer, Pabrec, which contains some important information not mentioned in the videos. I am very pleased with this product and expect the finish to outlast me and my wife.
Six years ago, we had our harvest gold tub painted by a “professional†and had problems with chipping paint from the very beginning. Over the years, I used some of the $20 bathtub refinishing kits found at Home Depot to touch up the peeling areas. I applied it with a brush and it looked crappy, but when company was coming, we would sand and paint paint over the bare spots and hoped they wouldn’t notice. Finally, we got sick of looking at it and decided to just replace the tub and surrounding tile walls. The first quote we got was $5,000! At first we were going to do it, then decided we didn’t want the expense and the mess of a remodel, so I was going to do the work myself. We kept weighing this option against simply buying another $20 kit and doing another touch up, but we were just sick and tired of it all. This is when I discovered Ekopel 2K. I have a lot of experience working with epoxy and know how strong the stuff is. We decided to order the kit and give it one last try before we dynamited the whole darn bathroom. The first thing was to remove all the old paint and a lot of it came off easily with single-edge razor blades. I found the best trick was to clamp the blade in a vice grip pliers and chisel it off that way. I was able to get most of it off in an hour or so. I did have to use some paint stripper in the spots where I had touched up the paint with the $20 kits but that wasn’t too bad. I cleaned the tub and used the recommended Lysol Toilet cleaner with the acid. According to the video, the Lysol is supposed to etch the surface of the tub, but it still looked shiny to me and I was concerned that the epoxy wouldn't take a bite, so I used my power sander and went over the entire tub to remove a bit of the shine. Maybe I didn’t need to do this, but I had the time and the tools, so I went with it. All of this paint removal and prep took me about three hours. The YouTube video set provided by the supplier, Refinished Bath Solutions, was extremely helpful and I watched the application portion at least three times. I followed the method as best as I could for a first timer, and it came out very well. I was concerned there wouldn’t be enough material to do the job, but it turned out I had almost 1-1/2 cups left over, and I even coated the soap dish. I think it took about 1-1/2 hours from the time I opened the can. The biggest problem area was working with the drain. One hassle was the toilet being in the way, so I would have to reach over to scoop the epoxy out. I would invariably bump my arm on the side of the tub and have to reapply in that area. As the material cured, I would continue to scoop out the material from the drain. About 6 hours after I started the application I removed the drain cover. Some material migrated over the drain flange which I removed the next morning with a razor and messed it up a bit there. One pro tip, use knee pads, even if you get a cheap pair. Something else to mention, the paint didn’t arrive with any instructions at all. At the last minute I discovered the Ekopel 2K Technical Data Sheet provided by the manufacturer, Pabrec, which contains some important information not mentioned in the videos. I am very pleased with this product and expect the finish to outlast me and my wife.
This is the 3rd time I am refinishing this tub and hopefully the last time. This product is different than any of the other products I've used before. I am happy with the outcome although I could have done better if I had watched more YouTube videos and got some of the tips I was missing as I was doing the tub. I would suggest that the seller include instructions. Just supplying a website is not adequate. Watch videos that individuals have posted, watch mine. I made plenty of mistakes that you could avoid by watching a wide variety. I included photos of my damaged tub and steps I took to repair it. I used razor blades, paint scrapers and a steamer to remove the old finish. I removed all of the caulk from around the tub. I used a lime, rust and calcium remover to clean the tub, rinsed it with water and then wiped it with alcohol and a clean cloth. Things you need: gloves, clean clothes, screwdriver, masking tape, drop cloth in at least 3 layers, hair dryer or heat gun, clean plastic cups, a wooden stirrer with squared sides. Wear close fitting clothing that you don't mind ruining. Make sure the temperature in the room is about 70- 75 degrees F. Too warm and the product hardens faster, too cold and it takes longer for it to harden. Try to make sure there is no dust flying around. Be careful of flying or crawling insects, if they get caught, they are stuck unless you can get them out bef ore the product stops self-leveling. Take everything out of the area. I took out all of the hanging shelves, soap off of the dishes and anything else that could possibly fall into the tub. Remove the hardware and pipes if you can if you can't remove them, protect them with masking tape. Shut the water supply off. I shut my tub valve off but I still had a drip. I used a baby diaper and a rubber glove taped over the spigot so no drips would ruin my work. The can has a seal on it and I needed to use a flat head screwdriver to remove it. Once you combine the 2 components, be prepared to stir thoroughly for at least 10 minutes or more. You can NOT use a drill or other mechanical stirrer, you will need to stir by hand. Once you have it stirred, start pouring on the corners and ledge of the far side. Start at 11 o'clock and go clockwise. Don't worry about the bottom of the tub until you have all the sides covered. Remember the bottom of the tub has a slight pitch and the product will level toward the lowest area, which is where the drain is. All in all, I think this is a wonderful product. I loved the result. I caused a few flaws but even with those flaws, it looks 99% better and almost new.
This is the 3rd time I am refinishing this tub and hopefully the last time. This product is different than any of the other products I've used before. I am happy with the outcome although I could have done better if I had watched more YouTube videos and got some of the tips I was missing as I was doing the tub. I would suggest that the seller include instructions. Just supplying a website is not adequate. Watch videos that individuals have posted, watch mine. I made plenty of mistakes that you could avoid by watching a wide variety. I included photos of my damaged tub and steps I took to repair it. I used razor blades, paint scrapers and a steamer to remove the old finish. I removed all of the caulk from around the tub. I used a lime, rust and calcium remover to clean the tub, rinsed it with water and then wiped it with alcohol and a clean cloth. Things you need: gloves, clean clothes, screwdriver, masking tape, drop cloth in at least 3 layers, hair dryer or heat gun, clean plastic cups, a wooden stirrer with squared sides. Wear close fitting clothing that you don't mind ruining. Make sure the temperature in the room is about 70- 75 degrees F. Too warm and the product hardens faster, too cold and it takes longer for it to harden. Try to make sure there is no dust flying around. Be careful of flying or crawling insects, if they get caught, they are stuck unless you can get them out bef ore the product stops self-leveling. Take everything out of the area. I took out all of the hanging shelves, soap off of the dishes and anything else that could possibly fall into the tub. Remove the hardware and pipes if you can if you can't remove them, protect them with masking tape. Shut the water supply off. I shut my tub valve off but I still had a drip. I used a baby diaper and a rubber glove taped over the spigot so no drips would ruin my work. The can has a seal on it and I needed to use a flat head screwdriver to remove it. Once you combine the 2 components, be prepared to stir thoroughly for at least 10 minutes or more. You can NOT use a drill or other mechanical stirrer, you will need to stir by hand. Once you have it stirred, start pouring on the corners and ledge of the far side. Start at 11 o'clock and go clockwise. Don't worry about the bottom of the tub until you have all the sides covered. Remember the bottom of the tub has a slight pitch and the product will level toward the lowest area, which is where the drain is. All in all, I think this is a wonderful product. I loved the result. I caused a few flaws but even with those flaws, it looks 99% better and almost new.
I am a property manager and a very experienced DIY’er and I would have to say that this was one of the most challenging projects that I have taken on in the last couple of years. On a difficulty scale of 1 to 10 for a DIY’er, I would give it a 9. - There are no instructions included with the product, but after finding them in the web, and watching an hour of YouTube, I thought I was prepared. - Prepping and taping the tub and surrounding area took over two hours. - Applying Ekopel means awkwardly leaning over your tub for 90 minutes, which is back straining to say the least. - There is a huge mess throughout the process, and cleanup is a nightmare. - If you are not able to remove your drain you are in for an even bigger challenge. I am looking at the result now and try to figure out how much sanding and which new product I am going to buy to cover up the problems. - There was just barely enough material included to cover my tub. - They make it seem if the pour over method will magically create the perfect layer across the entire tub. This is not the case. I have thin spots in some areas, and thick drips in others. - Although I followed the instructions about not scraping the bottoms or sides at the end, I still ended up with brown spots in some areas. After prep, application and initial clean up I am 7 hours into this job. I now need to make a trip to the hardware to buy a lot of sand paper to hopefully smooth out the drips, and a competitor’s product to hopefully fix the issues with the drain area and the thin spots. Those jobs should add another 3-4 hours, for a total of over 10 hours and close to $200. Not impressed...
I am a property manager and a very experienced DIY’er and I would have to say that this was one of the most challenging projects that I have taken on in the last couple of years. On a difficulty scale of 1 to 10 for a DIY’er, I would give it a 9. - There are no instructions included with the product, but after finding them in the web, and watching an hour of YouTube, I thought I was prepared. - Prepping and taping the tub and surrounding area took over two hours. - Applying Ekopel means awkwardly leaning over your tub for 90 minutes, which is back straining to say the least. - There is a huge mess throughout the process, and cleanup is a nightmare. - If you are not able to remove your drain you are in for an even bigger challenge. I am looking at the result now and try to figure out how much sanding and which new product I am going to buy to cover up the problems. - There was just barely enough material included to cover my tub. - They make it seem if the pour over method will magically create the perfect layer across the entire tub. This is not the case. I have thin spots in some areas, and thick drips in others. - Although I followed the instructions about not scraping the bottoms or sides at the end, I still ended up with brown spots in some areas. After prep, application and initial clean up I am 7 hours into this job. I now need to make a trip to the hardware to buy a lot of sand paper to hopefully smooth out the drips, and a competitor’s product to hopefully fix the issues with the drain area and the thin spots. Those jobs should add another 3-4 hours, for a total of over 10 hours and close to $200. Not impressed...
I have rentals that were built in the early 1960's. These are short, special order tubs besides the fact that they are hard to get out of the units and replaced without spending a lot of money. I had been looking on the internet for a product that would work and found Ekopel. I didn't check Amazon first because it is made in Armenia. I found a company for the first order. On You Tube, there is a contractor who has several videos on how to apply this that are way better than the manufacturer, one is about 30 minutes. I figured the tube couldn't get much worse, and for the price, it was a lot better than a new tub. I have done one tub so far and will be doing another this week. The results were amazing! And, the finish is guaranteed. The worst part was I didn't tape three layers of brown paper on the floor, one layer of brown and then two layers of newspaper--it wast too thin. The other thing I would do is use a pour cup with a handle (not a solo cup) as it will get all over your hands and gloves and you end up changing gloves and cups. I am using a paint cup with a handle for the next one. Hardest part is bending over the tub and trying not to touch the outside of it while you are scooping it up. I'm a 67 year old female so if I can do it, anybody can! No smell, dries in 24-48 hours and outshined everything else in the bathroom. It sets up in an hour and a half but I had plenty of time. Just a note, it will continue to run down the outside of the tub so leave one layer of paper down for the next 24 hours. I love this stuff!
I have rentals that were built in the early 1960's. These are short, special order tubs besides the fact that they are hard to get out of the units and replaced without spending a lot of money. I had been looking on the internet for a product that would work and found Ekopel. I didn't check Amazon first because it is made in Armenia. I found a company for the first order. On You Tube, there is a contractor who has several videos on how to apply this that are way better than the manufacturer, one is about 30 minutes. I figured the tube couldn't get much worse, and for the price, it was a lot better than a new tub. I have done one tub so far and will be doing another this week. The results were amazing! And, the finish is guaranteed. The worst part was I didn't tape three layers of brown paper on the floor, one layer of brown and then two layers of newspaper--it wast too thin. The other thing I would do is use a pour cup with a handle (not a solo cup) as it will get all over your hands and gloves and you end up changing gloves and cups. I am using a paint cup with a handle for the next one. Hardest part is bending over the tub and trying not to touch the outside of it while you are scooping it up. I'm a 67 year old female so if I can do it, anybody can! No smell, dries in 24-48 hours and outshined everything else in the bathroom. It sets up in an hour and a half but I had plenty of time. Just a note, it will continue to run down the outside of the tub so leave one layer of paper down for the next 24 hours. I love this stuff!
Claw foot tub. For me the hardest part was hand mixing for 15 minutes. Took me about one hour complete. Looks like new and no odor. I have always been willing to try something new. It's not as easy as your videos. But could be because I am 80 years old.
Claw foot tub. For me the hardest part was hand mixing for 15 minutes. Took me about one hour complete. Looks like new and no odor. I have always been willing to try something new. It's not as easy as your videos. But could be because I am 80 years old.
I got the product yesterday. Last night when I got home I started the prep work. Sanded down the chips and rust with a palm sander and wash the tub with the toilet bowl cleaner. Taped everything up and waited until this morning to use the product. I was a little freaked out to pour so fast but I went for it. If you watch the youtube video a couple of times you'll know what to do. I do have a run Around the over flow but it's not a big deal compared to the rest of the tub which came out flawless. To the dyi vet that had a hard time. Turn in your dyi badge this was a walk in the park! This product saved me thousands! The prep took longer then the actual application of the product.
I got the product yesterday. Last night when I got home I started the prep work. Sanded down the chips and rust with a palm sander and wash the tub with the toilet bowl cleaner. Taped everything up and waited until th is morning to use the product. I was a little freaked out to pour so fast but I went for it. If you watch the youtube video a couple of times you'll know what to do. I do have a run Around the over flow but it's not a big deal compared to the rest of the tub which came out flawless. To the dyi vet that had a hard time. Turn in your dyi badge this was a walk in the park! This product saved me thousands! The prep took longer then the actual application of the product.
First, the product is amazing when it’s finished. We put it on an old, rusty cast iron tub and it looks awesome! We did a thorough prep using a wire wheel and coarse sanding to remove most of the rust and remaining paint chips. We also used a rust inhibitor before applying the product. A couple of tips from a beginner: 1. Review the video online for this product, it’s very helpful 2. Stir the product thoroughly-at least 15 minutes 3. Apply the bulk of the product early (you only have 1 1/2 hrs to work before it starts to thicken/harden) to avoid drip marks. 4. You can do this yourself and save significant money!
First, the product is amazing when it’s finished. We put it on an old, rusty cast iron tub and it looks awesome! We did a thorough prep using a wire wheel and coarse sanding to remove most of the rust and remaining paint chips. We also used a rust inhibitor before applying the product. A couple of tips from a beginner: 1. Review the video online for this product, it’s very helpful 2. Stir the product thoroughly-at least 15 minutes 3. Apply the bulk of the product early (you only have 1 1/2 hrs to work before it starts to thicken/harden) to avoid drip marks. 4. You can do this yourself and save significant money!
I recently refinished both bathrooms in a rental home. The 1st one I used ArmoGlaze and the 2nd I used Ekopel after reading all the reviews and falling for the hype that it is the best tub refinishing product on the market. I prepped both tubs the same . The Ekopel left a streaky , terrible finish . On the tub I used the ArmoGlaze on I even had to use epoxy to repair chips in tub before coating . Hands down the ArmoGlaze finish is superior , So don't believe all that you read in these reviews. I tried both because I wanted the best to use going forward since I have more tubs in rentals to do. All I can say is that I will be buying the ArmoGlaze to do the next tub I do.
I recently refinished both bathrooms in a rental home. The 1st one I used ArmoGlaze and the 2nd I used Ekopel after reading all the reviews and falling for the hype that it is the best tub refinishing product on the market. I prepped both tubs the same . The Ekopel left a streaky , terrible finish . On the tub I used the ArmoGlaze on I even had to use epoxy to repair chips in tub before coating . Hands down the ArmoGlaze finish is superior , So don't believe all that you read in these reviews. I tried both because I wanted the best to use going forward since I have more tubs in rentals to do. All I can s ay is that I will be buying the ArmoGlaze to do the next tub I do.
This product may work for contractors, but I seriously dissuade any DIY work with this product. It does not level well, especially on the outer wall of tub. I cleaned the entire bathroom to minimize dust, and it still seems to have hair and dirt in the material. There are several places I will have to sand, and then pay a professional to redo the finish with a decent product (I don't ever want anything to do with bathtub refinishing again, this was a nightmare). I watched hours and hours of videos, and unfortunately none of them show how it actually turns out, so I can only assume it isn't possible to achieve an even coat. Probably the worst DIY product I've encountered, and I have remodeled most of my home. Also, it claims to be low odor, and it absolutely reeks. We will not be sleeping anywhere near that bath room for days. I recommend using a paint on method that can be controlled and more easily worked with. I would have used a paint on kit for a smooth finish but they are high VOC. I am chemically sensitive and this product promises low to no odor (lie). Also, it is supposed to continue being workable for 90 minutes, and it stopped leveling on the edges and left drips after 55 minutes. I should have known better, the videos make it look like a train wreck and it absolutely is. I now have a bathtub that looked 10x better before I poured this garbage on it.
This product may work for contractors, but I seriously dissuade any DIY work with this product. It does not level well, especially on the outer wall of tub. I cleaned the entire bathroom to minimize dust, and it still seems to have hair and dirt in the material. There are several places I will have to sand, and then pay a professional to redo the finish with a decent product (I don't ever want anything to do with bathtub refinishing again, this was a nightmare). I watched hours and hours of videos, and unfortunately none of them show how it actually turns out, so I can only assume it isn't possible to achieve an even coat. Probably the worst DIY product I've encountered, and I have remodeled most of my home. Also, it claims to be low odor, and it absolutely reeks. We will not be sleeping anywhere near that bathroom for days. I recommend using a paint on method that can be controlled and more easily worked with. I would have used a paint on kit for a smooth finish but they are high VOC. I am chemically sensitive and this product promises low to no odor (lie). Also, it is supposed to continue being workable for 90 minutes, and it stopped leveling on the edges and left drips after 55 minutes. I should have known better, the v ideos make it look like a train wreck and it absolutely is. I now have a bathtub that looked 10x better before I poured this garbage on it.
𠂾nglish Choose a language for shopping. $ USD - U.S. Dollar United States Choose a country/region for shopping.
- In which states is it also traded? You can find them more in Kentucky Massachusetts New York Kansas New Mexico but they are all over the country
Testimonials
bathtub repair kit , bathtub rust repair kit , best fiberglass tub repair kit , kohler acrylic tub repair kit , acrylic repair kit , acrylic bathtub repair services , american standard acrylic tub repair kit , acrylic tub repair kit home depot
Other products that may interest
The First Years 4 in 1 Warming Comfort Tub
Fisher-Price 4-in-1 Sling 'n Seat Tub
Fisher-Price 4-in-1 Sling 'n Seat Tub, Pink
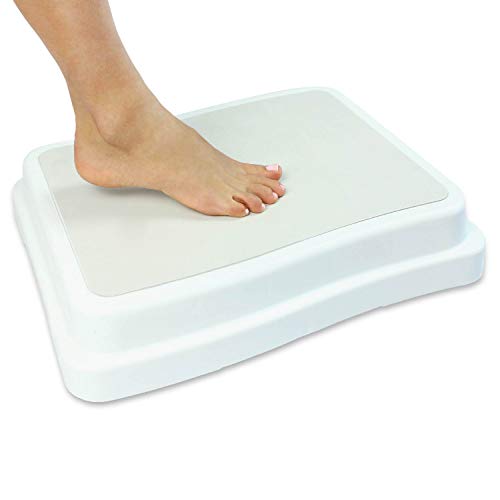
Ideaworks Bath Step - Slip Resistant Platform for Bathtub, Stackable, 4-Inch Rise
Drive Medical Portable Bath Step
American Standard 8888026.002 Bath Slip-On Diverter Tub Spout, 4 inches, Polished Chrome (Renewed)
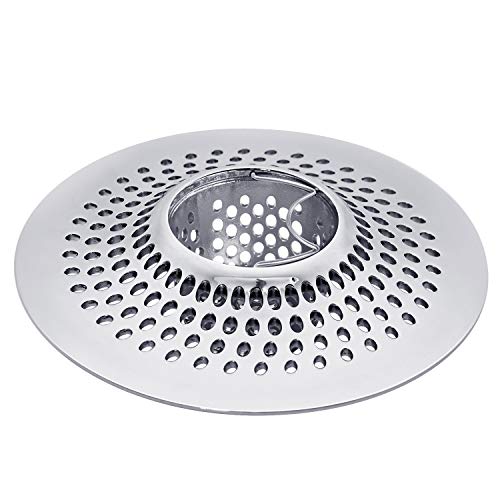
LEKEYE Drain Hair Catcher/Bathtub Shower Drain Hair Trap/Strainer Stainless Steel Drain Protector
The First Years 4 in 1 Warming Comfort Tub
4-IN-1 INFANT TO TODDLER BATHTUB - Designed to grow with your baby to keep them feeling comfortable and secure through 4 stages *0 *1NEWBORN BATHTUB â€" Insert cradles first-time bathers at a gentle incline and can be used in kitchen sink on its own or inside toddler tub *1 *2INFANT BATHTUB â€" A medium incline nestles older infants and features a gentle water cascade to help keep them comfortably warm *2 *3GROWING BABY BATHTUB â€" Remove the insert and one side of the tub supports a wiggly growing baby with an upright incline. Use from birth up to 25 lbs. *3 *4TODDLER BATHTUB â€" The other side of the tub provides the perfect perch for busy bathers who are ready to sit up and have some fun splashing *4


Fisher-Price 4-in-1 Sling 'n Seat Tub
4 ways to use as baby grows from newborn to toddler (max. weight 25 lbs. 11,3 kg) *0 *1Includes squeeze bottle *1 *2Convenient hook for drying *2 *3Plug for easy drain *3 *4Fits most sinks *4


Fisher-Price 4-in-1 Sling 'n Seat Tub, Pink
Four-stage bath center grows with baby from newborn to toddler *0 *1Soft mesh sling for newborns *1 *2Baby stopper prevents slipping *2 *3Sit-Me-Up-Support aids unsteady sitter *3 *4Scooper-duper whale toy for water play *4


Ideaworks Bath Step - Slip Resistant Platform for Bathtub, Stackable, 4-Inch Rise
Adds almost 4" to your step *0 *1Design for secure stackability *1 *2First step adds almost 4" *2


SlipX Solutions Bottomless Bath Overflow Drain Cover Adds Inches of Water to Tub for Warmer, Deeper Bath (Clear, 4" Diameter)
ENJOY A BETTER BATH EXPERIENCE: Treat yourself to extra inches of warm, luxurious bath water by using the SlipX Solutions Bottomless Bath® overflow drain cover. It adds precious inches of water depth without sacrificing safetyâ€"the cover blocks your existing overflow drain and has a hole at the top to release water a few inches higher. It’s a win-win for achieving a deeper bath without worry! *0 *1STOP LISTENING TO WATER TRICKLE DOWN THE DRAIN: Sink into bubbles, salts, magnesium flakes and scented soaps without hearing it all drip through the drain. The Bottomless Bath® prevents water from entering the perimeter of the overflow drain, so you can soak in peace! *1 *2DON’T WASTE TIME WITH PRODUCTS THAT DON’T STICK: Our proven design and high-quality material creates a powerful, lasting seal. When you’re filling the tub, simply run warm water over the suction cups and press each suction cup firmly against tub. *2 *3DON’T WORRY ABOUT FIT: Measuring 4†wide and 2†de ep, the Bottomless Bath® fits commonly found bathtub overflow drains, like toggletrip lever, flat, or snap drain types. *3 *4ENJOY PEACE OF MIND WITH OUR PROMISE: The Bottomless Bath® bathtub overflow drain cover is backed by the SlipX Solutions Peace of Mind Promise. If you have questions or concerns after using it, simply reach out to our friendly Customer Care Team via Amazon. *4


Drive Medical Portable Bath Step
Makes getting in and out of the bath tub easier and safer with an attractive slip-resistant textured finish *0 *1Unique modular design allows the multiple steps to be stacked *1 *2Step height is 4" (When stacking, each additional step adds 2") *2 *3Bath step comes with four removable covers on the surface (When stacking, remove covers to allow steps to lock together) *3 *4Overall Dimensions: 16"(L) x 19.5"(W) x 4"(H); Weight Capacity: 450 lbs *4


Vive Bath Step (4 inch) - Slip Resistant Shower Stepping Stool - Elevated Bathroom Safety Aid for Handicap, Elderly Seniors Entering, Exiting Bathtub - Nonslip Heavy Duty Bathtub, Bed, Kitchen
SAFELY STEP IN OR OUT OF THE TUB: Safely step in or out of the tub with a slip-resistant bath step. The extra-large platform is perfect for seniors, children and those recovering from injury or surgery. *0 *1LARGE, NONSLIP PLATFORM: The extra large platform is covered with a nonslip, textured rubber for additional stability and security while stepping in or out of the bathtub. Measuring 16†by 19.5â€, the platform provides secure footing for any individual. *1 *2STABLE 4†STEP: Providing an extra four inches in height, the bath step has low-profile rubber feet to keep the step from sliding on smooth or wet surfaces. The wide, stable base also prevents the step from tipping over for additional security. *2 *3DURABLE DESIGN: Constructed with a durable plastic material, the bath step safely supports up to 400 pounds *3 *4VIVE GUARANTEE: Unconditional lifetime guarantee so you can purchase now with confidence. *4


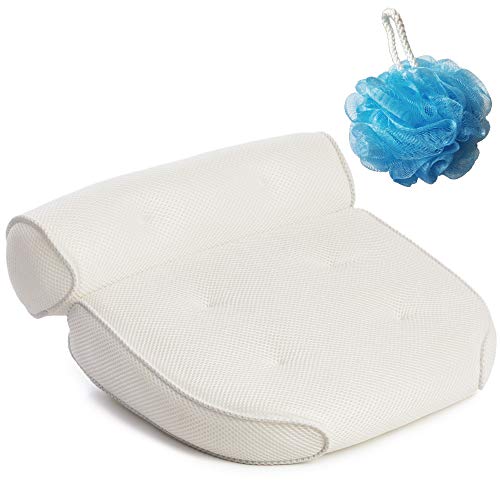
Gorilla Grip Original Premium Spa Bath Pillow with 6 Suction Cups, Free Bath Puff, 15" x 13", 4" Thick Comfortable Luxury Design, Quick Drying, Cushion Provides Head, Neck, Shoulder Support in Tub
THE PERFECT GIFT: Give the very best Secret Santa gift this year! The Gorilla Grip Premium Bath Pillow makes the absolute perfect gift for nearly anyone on your holiday wish list. With more than 2†of luxurious padded foam (and a soft bath puff included), you can truly give the ultimate gift of relaxation. *0 *1Why buy a bath pillow with only 4 suction cups when you can have 6?! Our premium bath pillow offers 2 extra suction cups to help your pillow stays in place on most smooth tub surfaces. Simply moisten each suction before application and press firmly on your tub surface for a secure grip. Plus, we love our customers so much we've included a free bath puff with every purchase! *1 *2MACHINE WASHABLE: Easy to clean! This pillow can be washed on cold with gentle detergent. Please wash the pillow by itself (without other clothing items). Never use bleach. Always air dry, do not iron. The pillow is carefully constructed with open weave mesh technology that helps stimulate active airflow and fast drying capabilities. This helps to prevent moisture and mildew from forming in your pillow. *2 *3LUXURIOUS COMFORT AND SUPPORT: Rest your head and sink your sore neck into our plush, soft premium bath pillow for luxurious comfort and relaxation. Our generous 2-panel, 4î thick design seamlessly contours and supports your head, neck and shoulders to ease those tense and tired muscles after a long day. Perfect for while you're soaking in a bubble bath, jacuzzi, spa and serves as a great gift for women, men, and more. *3 *4NO HASSLE GUARANTEE: We are proud to offer a no-hassle guarantee on our premium bath pillow. It is our goal to not only provide outstanding customer service, but to ensure you are completely happy with your purchase. If you are not happy with your flag just contact us directly (even if outside the Amazon return window) for a replacement or a full refund. Zero questions asked! *4


American Standard 8888026.002 Bath Slip-On Diverter Tub Spout, 4 inches, Polished Chrome (Renewed)
Durable brass construction *0 *1Fast and easy installation *1 *2For 12 Inch Copper Water Tube *2 *3Polished Chrome *3 *4American Standard Style That Works Better *4 *5slip on diverter tub spout *5


LEKEYE Drain Hair Catcher/Bathtub Shower Drain Hair Trap/Strainer Stainless Steel Drain Protector
Upgraded Detachable Drain Hair Catcher: Our detachable drain hair catcher equipped with tiny holes is designed to catch hair easily without blocking water drainage and effortlessly prevents toys or objects from escaping down the drain. Our hair catcher does a phenomenal job at keeping dirty tasks off your bathroom. *0 *1Innovation Design: Our original detachable drain hair catcher consists of two parts and is easy to be mounted by hands and departed to clean. Simply wipe and flush, no more tangled messes! Basket handle acts as a finger lift allows for easy installation, removal, and cleaning. *1 *2High-quality Materials: The drain protector is made with the finest quality stainless steel that is incredibly strong for unique durability. The premium stainless steel is rustproof, so you can rest assured that the drain hair catcher will stay in top condition for years to come and keep shinning elegance for your bathroom tub! *2 *3Practical Premium Drain Protector: Our catcher shower drain easily catches every hair and objects to protect your drain. Good tool to solves the clogging, saves hundreds on costly plumber bills, and protect environment and your pipes. *3 *4Quality Satisfaction: We believe in our products. That's why we back them all with 1-year and provide friendly, easy-to-reach support. Our stainless steel drain hair catcher has long service life, unlike those flimsy plastic strainer. We're sure that you'll love your new clog-free life with our drain hair catcher. Click "add to cart" now!" *4


Suggested bathtub enamel repair kit white -bathtub 5 -bath tub 8 month old -bathtub 27x54 -stokke flexi bath x-large tub in white/grey -bathtub 2 handle faucet -bath tub 80 inch -bath tub toys for 8 year olds -bath tub toys for 8 year olds -nath tub -bathtub decor


Publicar un comentario